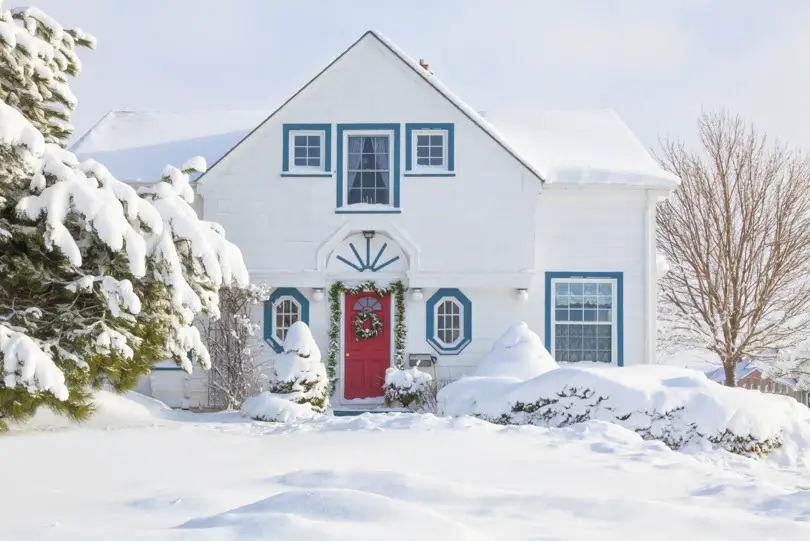
Winter takes a toll on everything practically exposed, including your home. Falling snow might look pretty, but the freezing temperatures can wreak havoc, causing damages that might be too expensive to repair.
Winter damages range from a collapsed roof, burst pipes, collapsed walls to blocked gutters. Standard homeowner insurance might cover damages caused by ice or snow but not damages from clogged gutters or burst pipes.
Therefore, winter preparedness is the only way to avoid costly repairs during spring.
Let’s be honest: preparing your home for winter is not something you can carry out without a plan. Improper preparations would be as worse as not preparing your home for winter at all. Costly repairs would still be waiting at the end of winter.
Now that you understand how harsh winter conditions can be, do you know the best ways to prepare your home for the winter weather?
Continue reading this article and learn five pro tips to get your home ready for the winter season.
Page Contents
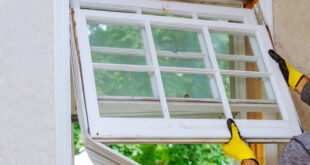
Insulate Windows
The worst thing that can happen is winter drafts flowing into the room through window spaces. Winter drafts distract your comfort and raise the energy bills at the same time. Proper window insulation is the only way to keep winter drafts away from your home.
To insulate your windows, you can consider using window insulation film. Window insulation films create a barrier between the inside of your home and the windows. Such barriers keep the winter drafts off your house and trap heat.
You can also use bubble wrap in insulating the windows. All you need is to spray a mist of water over the inside of your window. Then using tape, attach the bubble wrap to the wet window.
If sealed properly, the bubble wrap will keep the heat in and prevent the winter draft from getting into the house.
You can use nail polish if you don’t have the bubble wrap or the window insulation film. If properly applied, nail polish seals even the invisible cracks.
Apart from keeping a winter draft off your house, nail polish also stabilizes your window panes.
Inspect Your Fireplace When Preparing Your Home for Winter
During the winter season, you will need your fireplace in good shape for proper house warming.
Therefore, you will need to inspect your fireplace from inside and outside the house. During the inspection, ensure the chimney cap is present and in good shape.
If the chimney cap is not in good shape, chances are it might collapse due to the weight of snow during winter. A collapsed chimney cap will put your chimney at the risk of being flooded by melting snow.
During the fireplace inspection, also ensure no bird nests or debris are blocking the chimney. Having birds’ nests and debris blocking the chimney is risky than most people think. Bird’s nests blocking the chimney can lead to house fires, infestation, and dampness.
During the inspection, ensure the chimney plumb is not leaning at any side. In addition, check whether the flashing is tight against the chimney. If the chimney is leaning on one side and the flashing is not tight, the chimney might collapse due to the weight of snow.
However, if you use a gas fireplace, minimal maintenances might be needed. You will only need to ensure the gas logs are properly positioned and gas holes are not blocked. In addition, ensure you have enough heating oil and propane from a reliable propane delivery company to last you the winter season.
Check the Roof
The worst thing would be finding out that your roof is leaking when the first snow hits. Carrying out roof repairs at such a time might be challenging and expensive. An early thorough roof inspection helps you spot any potential issues that need immediate attention.
During the roof inspection, be on the lookout for any cracked caulk or rust spots. Cracked caulk or rust spots might not withhold the weight of snow, which could lead to your roof caving in. During the roof inspection, also ensure there are no broken shingles or masses of moss and lichen.
If you realize there are masses of moss and lichen, chances are the roof underneath might be decaying. A decaying roof come winter will either collapse or leak water.
Some roof repairs, such as replacing boots around the vents, might be easy to handle. But complicated repairs such as replacing shingles will require an expert.
But be warned, don’t just hire any roof repair expert. Hiring the right roof repair expert will save you money and guarantee quality work. For quality work, hire a licensed, insured, and experienced roof repair expert.
Clear Out Gutters and Downspouts
Clogged gutters and downspouts lead to the formation of an ice dam, such ice dams’ trap melting snow, preventing it from draining off the roof. The trapped water can leak through the roof and damage the walls, ceilings, and the house foundation.
During the gutter inspection, clean the gutters thoroughly and remove any leaves and twigs present. Also, ensure the gutters are not sagging. If they are, tighten the gutter hangers and downspout brackets.
But if the damage is too much, have the old gutters replaced with new ones.
Trim Tree Branches
The last thing you wish for is tree branches angling over your roof in winter. If the weight of snow is too much such branches might break off and damage your roof. Furthermore, branches angling over your roof might cause excess water to seep into the cracks present in your roof.
Therefore, ensure that any tree branches surrounding your house are at least four feet away from the roof.
Use the Five Pro Winter Preparation Tips
Preparing your home for winter saves you from frustrations and costly repairs. However, if you don’t know the right preparations to make come winter, you will still have more repairs to do.
Do you want to prepare your home for winter like a pro? Then, apply the above tips for getting your home ready for winter.
Did you enjoy reading this article? Be sure to check our other informative blog posts.
Winterizing your home- let’s have a closer look!
Fall is the time to winterize your house and adequate winterization involves several aspects. Keep reading for the details.
Winterize the Heating System
The heating system is crucial for your home in the winter, so make sure you manage the following tasks:
Run a test
Test the heating system in October. Turn the thermostat to heat mode and set it to 80F degrees. If your furnace doesn’t start running, you can try to diagnose it. Some issues are minors and have easy fixes; there are also severe problems requiring professionals’ services.
Check out the fuel supply
If your furnace runs on fuel oil or propane, you need to see if the tank is topped off and ready to operate.
Replace the air filter
Set up a new and clean air filter. It’s not difficult and you can get a free flow of air inside the house. Furnaces require specific air filters, so check out the manufacturer’s recommendations before replacing the filter.
Examine and clean the heating vents
Make sure that nothing is blocking the heating vents so that air flows freely. We encourage you to hire a technician to clean the air vent every year or two.
Inspect the exhaust vents
Some boilers, furnaces, and gas water heaters vent through the chimney, whereas new models (highly efficient) vent through plastic pipes that run through a sidewall. These vents have to be free of obstructions; otherwise, the furnace won’t burn efficiently and safely exhaust gases.
Look for carbon monoxide leaks
Carbon monoxide is hazardous and easy to detect with a cheap test badge or battery-operated alarm. If you find any issues, call in a professional to discover and eliminate the cause of the leak. Commonly, leaks in the furnace’s exhaust system or other appliances running on fuels (water heater) are responsible for the leaks.
Never postpone fixing this problem as a carbon monoxide leak is highly dangerous.
Winterize the Air Conditioning System
The condensing unit outside the house is often forgotten for winterizing. However, the unit also needs some TLC before winter sets in.
Cover the condensing unit
Wet leaves and debris will damage an unprotected condensing unit. As a result, the internal components will freeze and rust. Even if the units are installed outside, you have to protect them in the winters with a breathable waterproof cover. The cover will help the unit work efficiently and last for a long time.
Remove debris off the condensing unit
Use a hose and set its spray head to the highest pressure to remove dirt and debris from condensing coils and fan blades. Cover the unit for the season only after it has completely dried.
Winterize window air conditioners
If you have air conditioners, you should remove them and store them inside throughout the winter. When left outside, the units will be difficult to seal against cold drafts. When it’s not possible to remove the air conditions, you should at least close the vents and cover them the same way you did with the condensing unit.
Winterize Water Pipes
Water supply pipes have a high risk of freezing in the winter. Pipes bursting from freezing generate some of the most expensive repairs you could have for your home. Exposed drain pipes may freeze, so never get into the jolly season without winterizing the water pipes.
Take care of the exterior faucets
The exterior faucets (sillcocks and hose bibbs) require their water supply to be turned off before winter. Open up the exterior faucets to drain water from them. Look for an insulated cover to protect the hose bibb and don’t forget to disconnect the garden hoses and drain them.
Insulate exposed piping
Insulate all exposed water pipes in uninsulated spaces such as the attic, exterior walls, or crawlspaces. The minimum you can do is to insulate them with foam insulating sleeves. Ideally, you should first wrap the pipes with electrical heating tape and insulate them secondly.
Seasonal shutdown
If you’re shutting down the property for several months, make sure to shut off the water supply and drain the plumbing system. If leaks happen while you’re gone, you will face severe damage.
Winterize the Sprinkler System
Don’t skip the sprinkler system when preparing your house for the winter. If you have a lawn service, call them to drain and winterize the sprinkler system in October. It’s not challenging to winterize the sprinkler system and you can also do it.
You need to shut off the water, drain the pipes, blow the lines until there’s no more water, and open test cocks on the vacuum breaker to let air into the system. It’s an efficient way to stop water from getting trapped inside, freezing, and cracking the plastic water lines.
Winterize the Pool and Spa
The type of pool and spa you have affects the steps you have to take for winterizing. If you have an above-ground pool, you will need to follow more steps than when your pool is in-ground. The best way is to have your pool maintenance technicians perform the necessary winterization procedures. Otherwise, we strongly recommend you follow the manufacturer’s recommendations to winterize the pool.
Don’t forget to prepare the landscape and outdoor items!
You have to prepare the yard before winter kicks in. The standard lawn and garden winterizing methods will protect your grass, flower beds, and plantings. Keep reading for details:
Clean and seal concrete
Patch all cracks or damage to concrete walkways and steps before winter sets in.
Cover patio furniture
Store the patio furniture inside or cover it adequately during the cold months.
Drain water features
Unplug all pumps from water features such as fountains.
Seal/stain the wooden deck
If your deck is sealed correctly, the risk for winter damage will decrease significantly. You don’t need to do it every year.
Drain the lawnmower gas
Drain a gas mower and gas-powered lawn tools that you won’t use until spring. Store them where it’s dry and safe for the winter.
Clean and store the grill
Give the grill and barbecue equipment a deep clean and cover/store them inside during winter.
Clean and store garden tools
Remove all dirt from your garden tools and store them in a dry place until spring.
Frequently Asked Questions
Is it safe to leave a house unheated in the winter?
You can close off for the winter or at least reduce the temperature in any room in your house for the winter. However, we don’t recommend leaving any room unheated because the flooring may crack, ice forms inside the windows, and plaster cracks may widen. The damage will be necessary, rending you to spend a lot on repairs in the spring.
What is the best temperature to leave an empty house in winter?
As mentioned, you should never leave your house unheated for the winter. Play it safe and set the thermostat between 55 and 60 degrees. Digital thermostats are an excellent investment in a home, especially if you like going on an extended vacation in the winter.
You’ve left your house unheated in the winter. What can happen?
In time, an unheated house will have the same temperature as the outdoors. Even the best-insulated places will slow down as winter goes by. Heat will slowly escape through vents, cracks, and even solid walls. The plumbing will be left unprotected and may eventually crack.
Is it possible for pipes to freeze even if the heat is on?
It all depends on how the pipes are exposed to the elements and winds, but lines can freeze below 20 degrees. Pipes near openings and cracks that allow cold to get in the house can develop ice blockages, even if they’re near a heated area.
Should you leave the faucet on if the pipes are frozen?
Make sure to leave the faucet open. When you manage the frozen pipe and the frozen area starts to melt, water will begin to flow through the frozen area. Running water through pipes will make the ice in the pipe melt.