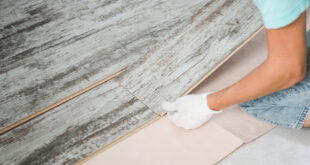
Redoing and sanding hardwood floors can be an unforgiving task. If you make any mistake, it will surely show. But a floor that has been refinished will add more beauty to your room – still better than any method of beautification.
When planning a floor refinishing, you need to decide if the project would be assigned to a contractor or you will do it yourself. Hiring a specialist would cost a few dollars per square foot. It implies that if you will be working a two thousand square foot home, be prepared for over five thousand dollars on materials and labor. On the other hand, doing it by yourself will cut these costs by half. Keep reading for some quick tips to apply. Alternatively, you can also use these tips to redo your resin flooring.
How to Refinish Your Hardwood Floor?
The following tips will help you get better results while redoing your floor :
- The floor and area surrounding it must be prep
Before working with your floor, first, clean the area. No rugs, curtains, or furniture should be visible. This will help you observe the task you are working on. Also, don’t forget to seal doors and vents before redoing your floor. According to Home Depot, plastic sheeting can be used to seal the air vent covers. It helps prevent dust from settling across your house.
- Never skip PPE and safety equipment
The rules and regulations which apply to contractors may not apply to you if you will be working your floor by yourself. However, for your safety, you need to apply some safety precautions.
You will have to use the needed Personal Protective Equipment (PPE). But then and use them properly.
- Use sanding tools that are DIY friendly
Even though specialists may use a drum sander to refinish a hardwood floor, you can’t try this as an amateur. It could be a disaster!
Using drum sanders will be challenging for beginners. That’s not all, it has stringent requirements. For instance, for best results, the wood grain must be followed. As an amateur, pick equipment and sands that are DIY friendly.
- First, tackle major damages
This would be done before selecting your sander. First, examine the floor you are working with. A roughly damaged floor needs a quick fix. Work on that first. Simply use wood fillers. They will help you patch up those cracks, scratches, and little holes. You will want to begin the tour sanding process with a slightly smooth surface, not a rough one.
- Use the right sandpaper
You will be using different types of sandpaper for smooth flooring work. The process of sanding the floor is a multi-step procedure. Before with a rough grit, not rougher than 60 grit. You may progress from here until complete it with a 100 grit for a better smoothen work.
Use two-coat finishing
You don’t need to rush the finishing coat. Refinishing your hardwood floor needs some patience. For best results, even professionals will suggest that you apply a minimum of two coats for the finishing. That means you must wait for each cost to dry – it could take up to 8 hours.
Conclusion
Redoing your floor will add more beauty to the tour room. If you have the cash, you may hire a specialist. Doing it yourself can keep the cost low by 50%.
 A Very Cozy Home Home Decor Tips and Ideas