No matter which tool you’re planning to use in your shop, safety should be one of your main concerns. You should always do your homework when it came to your tools and read all the safety instructions that you need. Using safety glasses, protecting your ears and your lungs are only some of the aspects that you need to address even before trying to learn to master a tool.
When it comes to the miter saw or any other tool in your DIY shop, some tips are fundamental for getting the best results on your project. Scroll down for checking them. Nobody complained about mastering too well the miter saw J
- Tune-up the miter saw
Miter saws come from the factory so that the saw blade is square to the table, whereas the fence is square to the edge. On the cause of the shipping, the saw can suffer some mild alterations.
It’s pretty standard for miter saws to lose the adjustments when stored or moved around. Therefore, you need to make sure that your saw is cutting square whether it’s a new one, you’ve just taken it out from the storage space or moved it around in your shop. Take a look at some tutorials to see the best way to tune-up your miter saw.
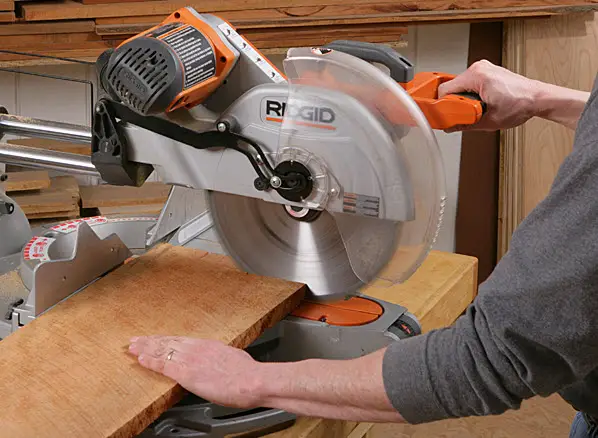
- Trim the ends of the board
Wood isn’t all perfect. Finding a board that is a perfect square is almost impossible. But you want your DIY projects to be accurate, which is why you should square the end of the board before you cut the board using a miter saw. Cut at the end of the board precisely. It doesn’t have to be a lot, just enough to get an end square.
You should be able to cut the board to length when the end is square.
- The blade has to stop completely
Ever wondered what happens when you’re cutting board and raise the edge in the middle of cutting? Well, the blade is going to cut the board twice. It cuts once as you lower the blade and once again the moment you’re raising the edge.
It’s not a wise thing to cut the board twice. It can change the measurement of the board for good. It’s essential that you maintain the line, allowing the blade coming to a complete stop when using the miter saw.
- Keep the line
If you have enough experience, you should know that you always need to leave the line. Don’t ever cut on the line and it’s merely because that if you cut it shorter, you’re not going to be able to put it back on. It’s like with cutting some fabric: once you slice it, it’s gone! Sure you can fix it, but it’s not going to be whole again.
Therefore, it’s essential that you always leave the pencil line when you’re using the miter cut. You may finish with some fine-tuning cutting later on if you need it to shorter.
- Decide a stop for the repetitive cuts
The repetitive cuts are one of the many jobs that you can try with your miter saw. Garden cabinets, outdoor beverage tables, outdoor coffee tables are only some of the many DIY projects that involve repetitive cuts. You shouldn’t measure and cut every piece, but action and set up a stop.
The stop is, in fact, a piece of scrap wood and you use a Quick-Grip spring clamp for clamping to your miter saw. Once you placed the stop, you should slide the piece right up to the stop. It’s easier not to cut several pieces of wood to the same length.
- Make laser precision cuts
If you’re a newbie, you may not know it just yet, but you can make accurate laser cuts with your miter saw. The blade is essential for the tiny adjustments you have to make.
Here are the steps to take:
- Trim the end of the board. Remember the part of squaring the end of your board?
- Measure your workpiece. It’s vital that you work from the end of your board. Measure the length you need and mark it with a pencil mark.
- Decide on your miter saw stop and keep the pencil line. Place your workpiece so that you see the pencil line throughout your cutting. For the obvious reasons, you shouldn’t set a stop when you’re only cutting a single piece.
- Use your miter saw for the accurate laser cuts. When the workpiece is too long, don’t hesitate to use the blade for making the small adjustments, until you get the length you need for your workpiece. Turn off the miter saw, put the blade as low as you can and slide the workpiece as slow as you can until it reaches the side of the edge. You need to maintain the board in place, raising the blade. If you’re using a stop, you should reposition it (it has to touch the end of your workpiece). As you’re lowering the blade, the teeth should slightly reach the end of the workpiece.
- Raise the blade once again, turn on the saw and lower so that you can cut. The edge is going to cut only a tiny amount off your board.
- Measure your workpiece once again. Is it what you wanted? If so, you may move on to the next phase of your project. If not, you need to go back a few steps.
What is the role of the miter saw stand?
Even if you’re struggling with space in your shop, you should try your best and have a dedicated miter saw stand. More often than not, you place the miter saw on a workbench for making a few cuts and then you put it on the floor so that you can continue on your project. It’s going to be so difficult to fix if the pieces are too short. The workbench is already occupied with something else involved in your project, and you end up on the floor, trying to fix the cuts.
Making a miter saw stand could very well be your very first DIY project, and you should never hesitate about having one.
Other resources
https://www.familyhandyman.com/tools/miter-saws/how-to-use-a-power-miter-saw/
https://www.popularwoodworking.com/projects/tips-for-mastering-the-miter-saw/